Once again, it’s time to check in on my progress in Dragon Age: Origins. Last week, I had decided to help Lord Harrowmont become the new dwarven king. To help get people to join his cause, he sent me to Dust Town to deal with the Carta, a criminal syndicate run by a dwarf named Jarvia. So, how did that end up? Well, before we get to that, we need to talk some numbers. My current play time is about 22 hours and Ivan Ooze is currently level 16.
Dust Town is the poorest district of Orzammar, and thus the place is full of beggars. This is good however, because it shouldn’t be too hard to bribe someone to tell me where I can find Jarvia. While talking to people, I came across someone who was willing to get me a pet nug, which is something that Leiliana had asked for. So, that’s out of the way. But, more importantly, I found someone to give me the information I’m looking for.

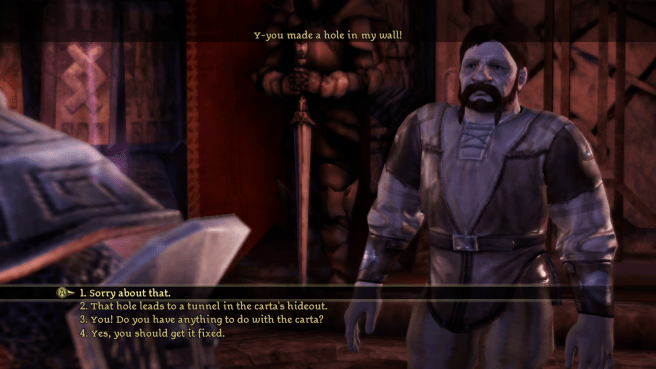
Apparently, there is a house that can only be opened with a finger bone token, which Carta members should have on them. With that information, I find some members, beat them up, and take a token. Once that’s taken care of, all I had to do was walk up to the house, insert the token, and I was inside the Carta hideout.
At this point, it just became a whole bunch of fighting. Room after room of Carta members trying and failing to kill me. Sometimes I wonder how much different this game would be if I wasn’t playing on easy. Eventually, I find Jarvia. We talk a little bit, but it doesn’t really go anywhere. After another quick fight, Jarvia is dead and I can return to Lord Harrowmont.
Like most dungeons in this game, there’s a quick exit at the end so you don’t have to backtrack through the whole thing to get out. This one exits into a shop, who’s owner had no idea that his shop was connected to the Carta hideout. He’s kind of freaked out about it, and asks that I don’t tell anyone so no one jumps to conclusions. That’s fine, and also pretty silly.
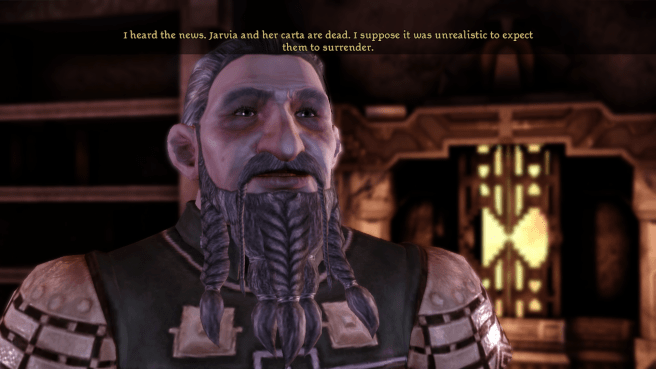
After all that, it must be time to crown Lord Harrowmont the new king, right? Well, not exactly. Now Harrowmont wants me to go in search of the Anvil of the Void, an ancient relic used to create golems. Apparently, Paragon Branka went in search for it a while back and never returned. Also, Bhelen is looking for it, so we should probably get to it first.
Doing so means going back to the Deep Roads. A dwarf we had talked to a while back but I’m pretty sure I failed to mention named Oghren stops us before we can head out. Branka was his wife, and he’d really like to join us and hopefully find her. I agree and he joins the party.
This part of the game takes a surprisingly long time. The Deep Roads is split into several different areas, and in each one we need to clear out some bad guys. At one point, we find a dwarf named Ruck, who’s mother had asked had asked me to find him in a side quest that I didn’t mention. Ruck’s gone crazy as a result of feasting on dark spawn. I try to get him to go back and see his mom, but he’s having none of it. Oh well.
Later, my party gets ambushed by a whole bunch of spiders, including a queen spider. This is a pretty obnoxious boss fight. It isn’t particularly difficult, but again, I’m playing on easy. It’s annoying though, because the queen will just jump away after a few attacks. So it all boils down to hitting her a few times, seeing where she jumps to, running up and hitting her again, and repeat. But, we kill her and continue our journey.
As we enter our next area, a cutscene plays out where the Archdemon flies around for a bit. That’s pretty crazy. Then we find a group of dwarves fighting some darkspawn. We help them out, and just keep moving forward. Eventually, we find Hespith, a female dwarf who’s been tainted by darkspawn blood. Apparently, she was Branka’s lover. Strangely, Ohgren doesn’t seem to surprised by this news. She also tells us that the darkspawn capture women to turn them into broodmothers, which give birth to new darkspawn. She also explains the process of becoming a broodmother, but I’ll let you look that up on your own if you want.

Pretty quickly after learning about broodmothers, we find ourselves fighting one. This is a significantly harder boss fight, and I was actually down to just one character by the time I beat it. All in all, it’s still just “hit the enemy until it dies”, but this one was a lot stronger than previous ones. Now, we can head to the Anvil of the Void.
Along the way, we finally find Branka. She’s gone nuts while trying to get to the Anvil and can’t seem to be reasoned with. She needs us to deal with some traps along the way so that she can finally get to the Anvil. Okay, fine, whatever. The traps really aren’t anything too complicated. For example, one is just a room with poison gas and a couple golems. Kill the golems before the gas kills you and you’re on your way. There’s four different traps, and they’re all about that level of difficulty.
After getting through the traps, we meet Paragon Caridin, who is a golem. He tells us about how he used the Anvil of the Void to create golems, including Shale, by putting people’s spirits into golem bodies. Also, Shale is apparently a woman. Caridin says that he had originally only used volunteers to become golems, but eventually was forced to use unwilling people. When he rejected that idea, he was turned into a golem himself. Caridin wants the Anvil destroyed, so that it cannot be used anymore, but he can’t do it himself because apparently, golems can’t touch the Anvil.

Branka shows up and doesn’t want us to destroy the Anvil. It clearly seems to be an instrument of evil, and I’m playing a generally good character, so I side with Caridin. This leads to a fight with Branka, killing her. Ohgren gets over it surprisingly quickly.
Before destroying the Anvil, we ask Caridin to make us a crown. He agrees and makes it on the Anvil. While making it, he’s very clearly touching the Anvil, so I don’t know what he was talking about before. Now, we have a crown, made by a Paragon, to give to Harrowmont. We destroy the Anvil by pushing it into a nearby lava pit, and then Caridin kills himself by jumping in as well.
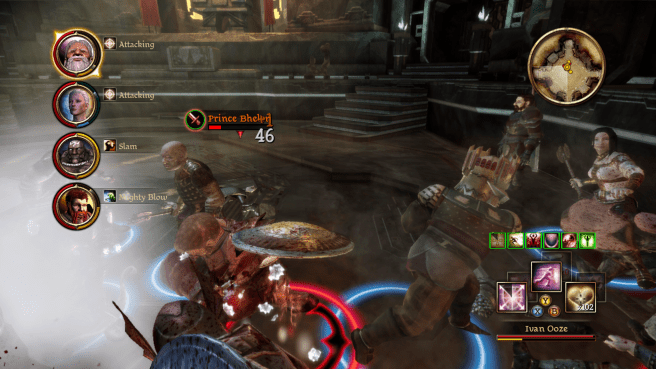
We return to Orzammar to find the election of the new king taking place. We proclaim that we have a crown made by a Paragon and that it’s intended owner is Harrowmont. This leads everyone to follow Harrowmont, but leaves Bhelen pretty pissed. He attacks us, but we quickly kill him and his followers. Harrowmont returns the favor by agreeing to join us fight the blight.
And there’s where we’re at so far. That would be all of the contracts taken care of, so I believe our next step is finishing up some side quests, like telling Morrigan that we killed her mom and giving Leiliana her new pet, and then starting to finish up the game. Let’s see how close we can get next week.
